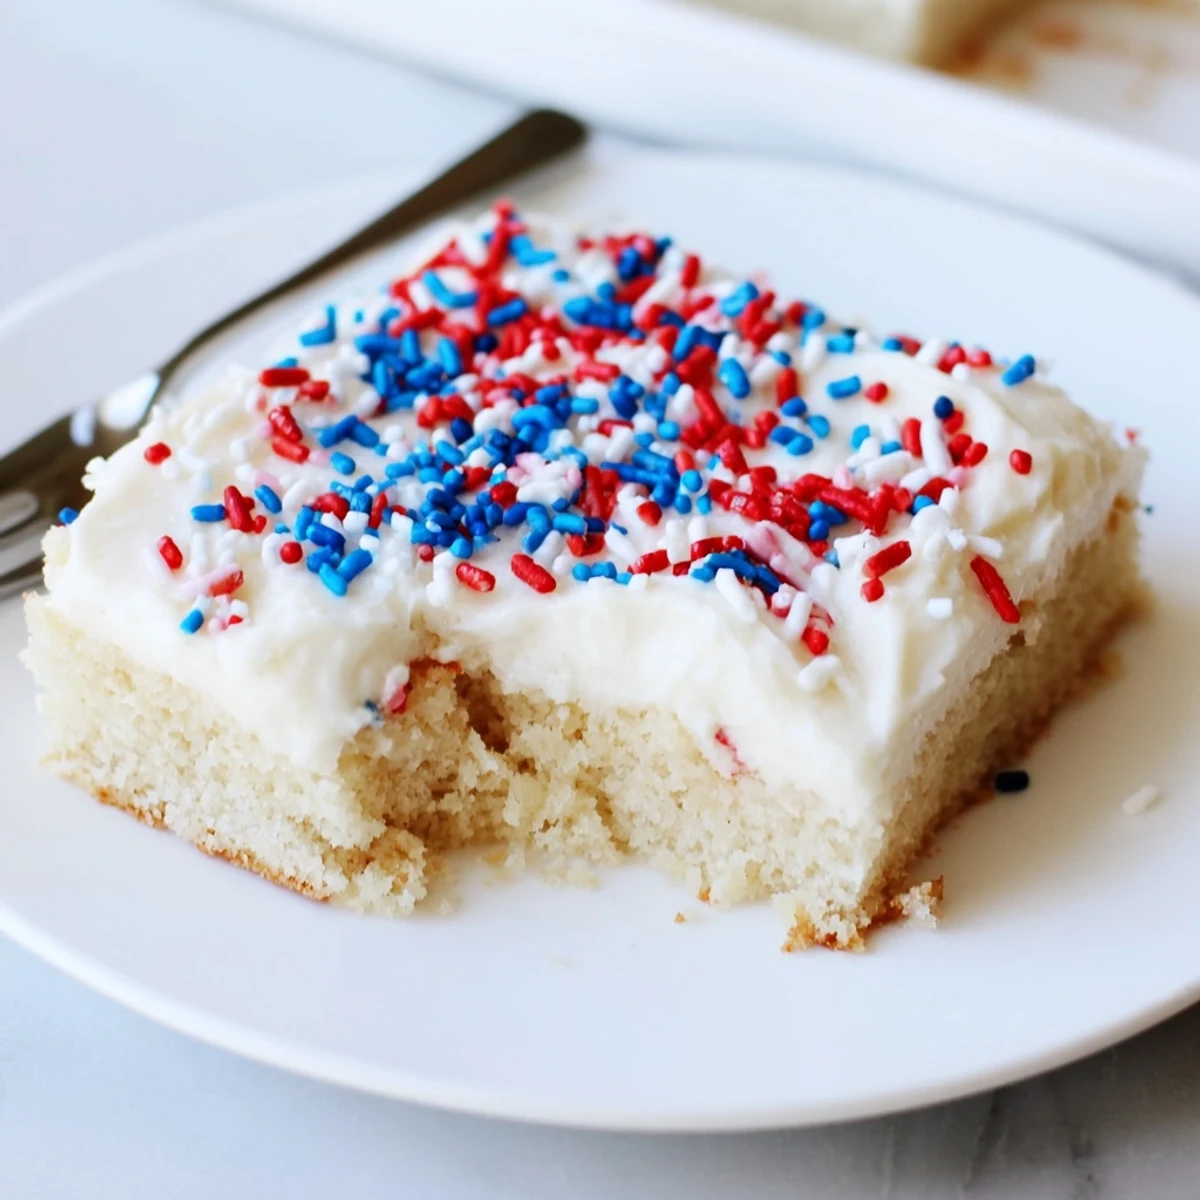
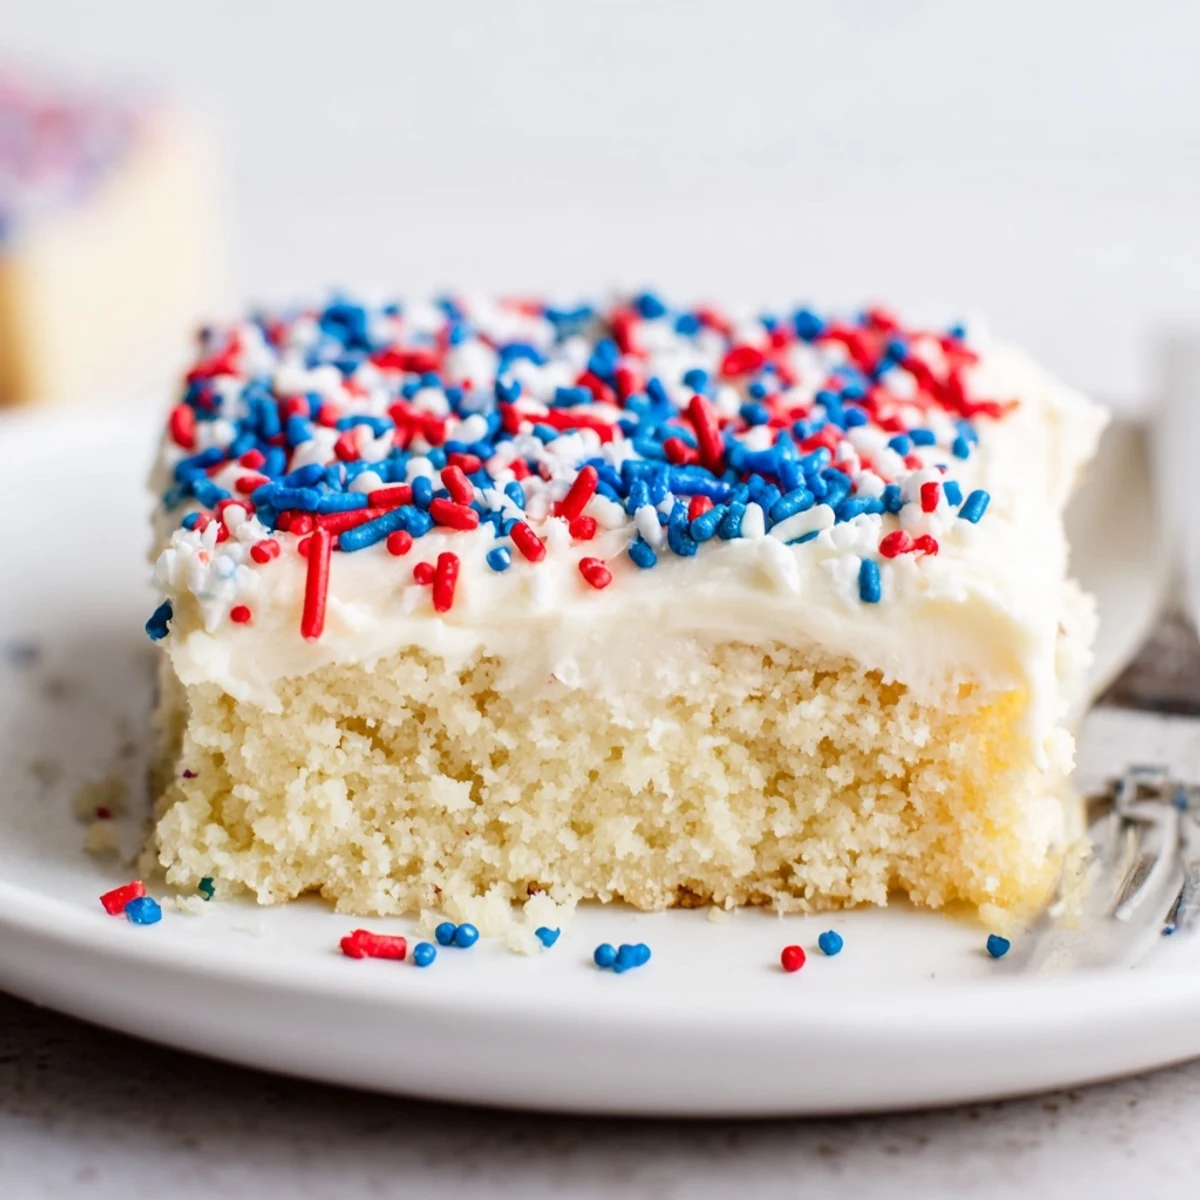
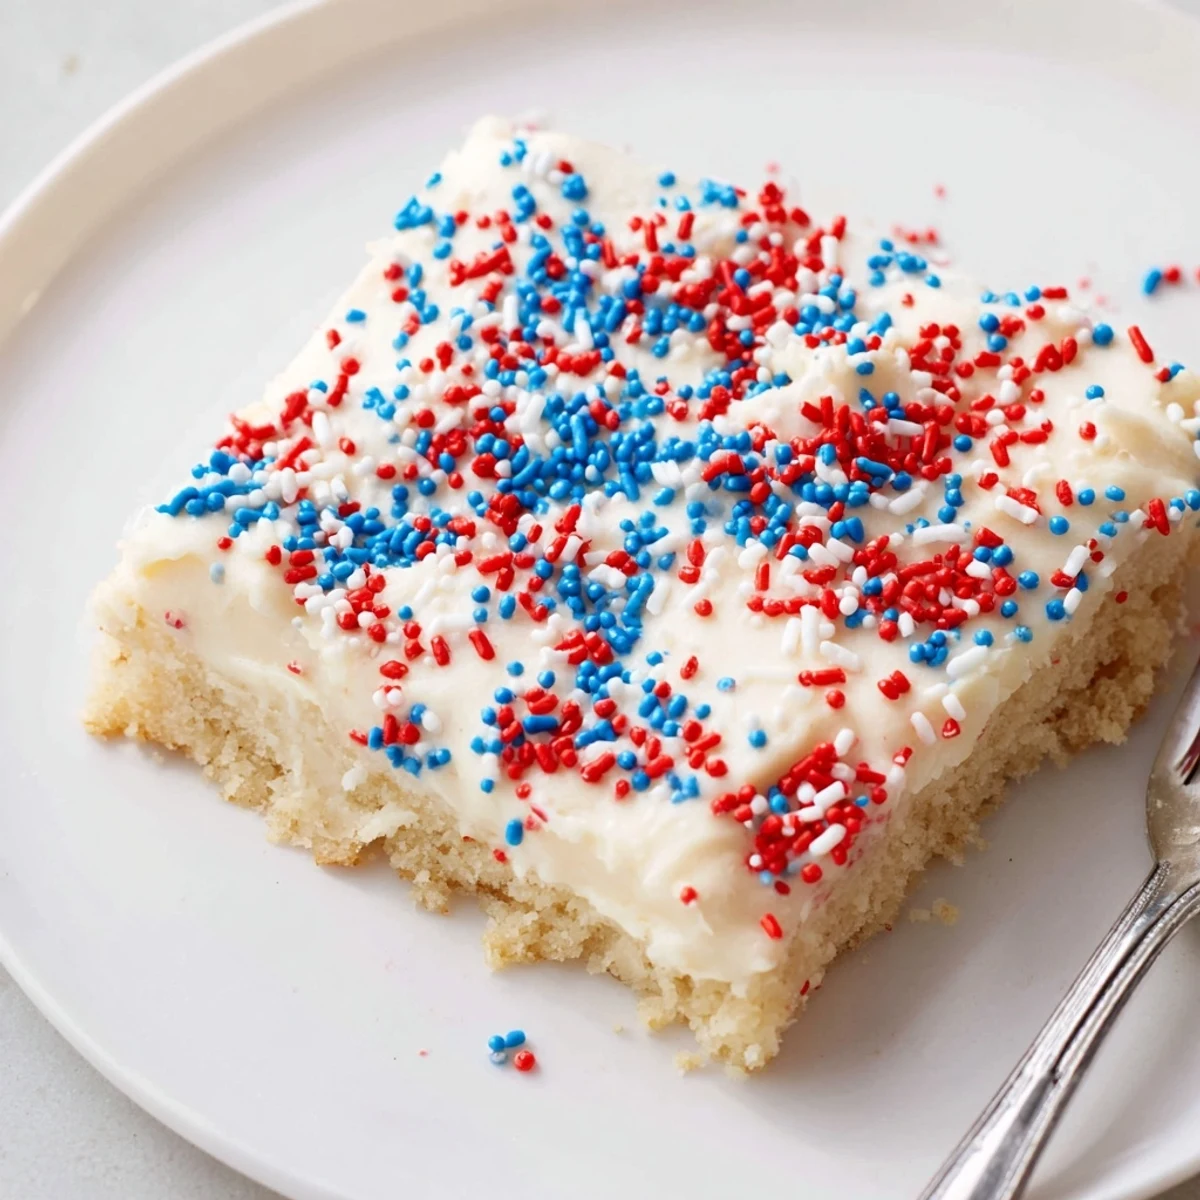
 Pin it
 Preheat oven to 350°F and line a 9×13-inch pan. Whisk flour, baking powder and salt. Cream softened butter with sugar, beat in egg, yolk and vanilla, then fold in dry ingredients. Press dough evenly into the pan and bake 18–20 minutes until edges are golden and the center remains slightly soft. Cool completely. Beat butter, powdered sugar, milk and vanilla until fluffy; spread over bars and top with red, white and blue sprinkles. Cut into 16 squares. Store in an airtight container up to 3 days or freeze for longer storage.
Some desserts just light up a room, and these Fourth of July sugar cookie bars do exactly that. The first time I made them, the butter was melting a little too quickly in the summer warmth and I almost fretted, but the sweet aroma coming from the oven calmed me down. Between scraping every bit of vanilla-scented dough from the bowl and sprinkling the festive reds and blues, there was something playfully satisfying about each step. Somehow, they became my cheerful answer to summer gatherings.
The most memorable batch was last Independence Day, when the kitchen was a whirlwind of sprinkles, and my niece insisted every bar had maximum sparkle. Everyone hovered close, drawn by the waft of warm sugar and vanilla, snatching up cooled bars before they’d even been sliced properly. Even our most frosting-skeptical relative couldn’t resist licking a bit off his thumb. That impromptu snack became the start of a long, sunset-lit evening of laughter.
Ingredients
- All-purpose flour: Gives the bars their reliable, pillowy base—be sure to fluff it and spoon into your cup for even measurements.
- Baking powder: A gentle lift is all you need to keep the cookie bars soft and thick; make sure it’s fresh.
- Salt: Just enough to balance the sweetness and bring out the vanilla flavors.
- Unsalted butter (softened): Room temperature butter is key for creaming; I’ve learned cold butter makes these bars denser.
- Granulated sugar: Essential for that classic sugar cookie sweetness and a touch of caramelization at the edges.
- Large egg & egg yolk: The yolk adds extra richness and keeps the bars moist longer.
- Pure vanilla extract: The aromatic heart of these bars; don’t skimp on quality if you can help it.
- Almond extract (optional): Adds a whisper of something mysterious; use sparingly for a subtle twist.
- Powdered sugar (sifted): Sifting ensures the frosting is cloud-like and flawlessly smooth.
- Milk: Adjust for a spreading consistency that won’t tear the bars beneath.
- Red, white, and blue sprinkles: The finishing touch—layer them on thick, and watch everyone smile.
Instructions
- Get your pan ready:
- Line your 9 x 13 inch pan with parchment paper, leaving some overhang, so the bars lift right out later without a fight.
- Mix the dry stuff:
- Whisk the flour, baking powder, and salt in a bowl; enjoy the soft swish as you stir—these steps help the bars rise just so.
- Cream butter and sugar:
- Beat the butter and sugar together until pale, fluffy, and promising—if the mix looks grainy, keep going; the change is worth it.
- Add the eggs and flavor:
- Crack in the egg and yolk, pour in the vanilla and, if you wish, a dash of almond extract; the kitchen starts to smell a little magical at this point.
- Combine and finish the dough:
- Add the dry ingredients in thirds, mixing gently until just combined; overmixing takes the bars from tender to tough.
- Press and bake:
- Scoop out the dough into the pan, patting it down with a spatula or your fingertips until it hugs every corner.
- Bake to perfection:
- Let them bake for 18 to 20 minutes, just until the edges are a faint gold and the center looks set but soft to the touch.
- Cool completely:
- Patience is key—pop the pan on a wire rack and resist cutting until they’re fully cooled so the frosting won’t melt.
- Make the frosting:
- Beat softened butter until creamy, then slowly work in powdered sugar, milk, vanilla, and a tiny pinch of salt until you have a spreadable, fluffy mix.
- Frost the bars:
- Smooth the frosting over the cooled bars, swirling gently for pretty peaks.
- Decorate:
- Shower with patriotic sprinkles until you have a festive, star-spangled surface that’s entirely your own.
- Slice and serve:
- Use the parchment handles to lift, then slice into 16 bars, ready to share and devour.
 Pin it
 Once, while dusting the still-warm frosting with sprinkles, my uncle played the national anthem on an old, slightly out-of-tune guitar, and for a fleeting minute, it felt like the whole house paused to listen, bars in hand. Sugar cookie bars have a sneaky way of bringing even the busiest crowd into a single, happy moment.
A Shortcut for Party Days
When you’re making these for a crowd, lining the pan with parchment is the only way to keep things stress-free—no more prying bars out or scrubbing sticky corners. I sometimes double the recipe and bake two pans at once, then stack the cut bars on a festive tray for an easy-to-grab treat. They freeze surprisingly well too, so you can sneak a few away for later or make them ahead of your big gathering.
Keeping the Bars Soft and Chewy
Pulling the bars from the oven with just a hint of golden color at the edges is my top trick for ensuring they stay plush—even after a day or two. Overbaking leads to firm, dry bars, but a little softness in the middle keeps them bakery-fresh. Cover leftovers tightly with plastic wrap to keep them from drying out in the summer air.
Decorating Like a Pro—No Fuss Required
The real celebration comes at the decorating stage: don’t stress if the frosting isn’t perfectly smooth, because generous sprinkles cover all. I sometimes let kids or guests take over, and we end up with wild designs—sometimes a flag, sometimes just bursts of color, always delicious.
- If your frosting is too stiff, a splash of milk gets it just right.
- Add food coloring to half for a red-and-blue swirl effect.
- Don’t forget to set aside a bar or two for yourself—they disappear fast at parties.
 Pin it
 Sharing these sugar cookie bars on a hot July afternoon always leads to grins and sticky fingers. Here’s to turning simple ingredients into edible celebrations all summer long.
Recipe FAQs
- → How do I keep the bars soft in the center?
-
Bake until the edges are lightly golden but the center still feels slightly soft to the touch; carryover heat will finish setting. Avoid overbaking and cool the bars completely in the pan before frosting to preserve a tender interior.
- → Can I make these gluten-free?
-
Yes. Substitute a 1:1 gluten-free flour blend in place of the all-purpose flour and check texture—some blends absorb more moisture, so you may need a tablespoon or two of milk to adjust the dough.
- → What’s the best way to color the frosting?
-
Use gel food coloring to get vivid hues without thinning the frosting. Add a few drops and mix until evenly colored; if the frosting becomes too soft, chill briefly to firm it up before spreading.
- → How should I store and transport the bars?
-
Keep frosted bars in an airtight container at room temperature for up to 3 days. For travel, layer squares between parchment sheets to prevent sticking and keep container cool to avoid frosting smudging.
- → Can I make these ahead and freeze them?
-
Yes. Freeze unfrosted bars wrapped tightly in plastic and foil for up to 2 months. Thaw fully, then frost and decorate. Alternatively, freeze frosted bars in individual layers separated by parchment for quicker portions.
- → How can I tell when the bars are done?
-
The edges should be set and lightly golden while the center remains slightly soft. A toothpick inserted in the center may come out with a few moist crumbs; avoid waiting for a fully dry toothpick to prevent dryness.