 Pin it
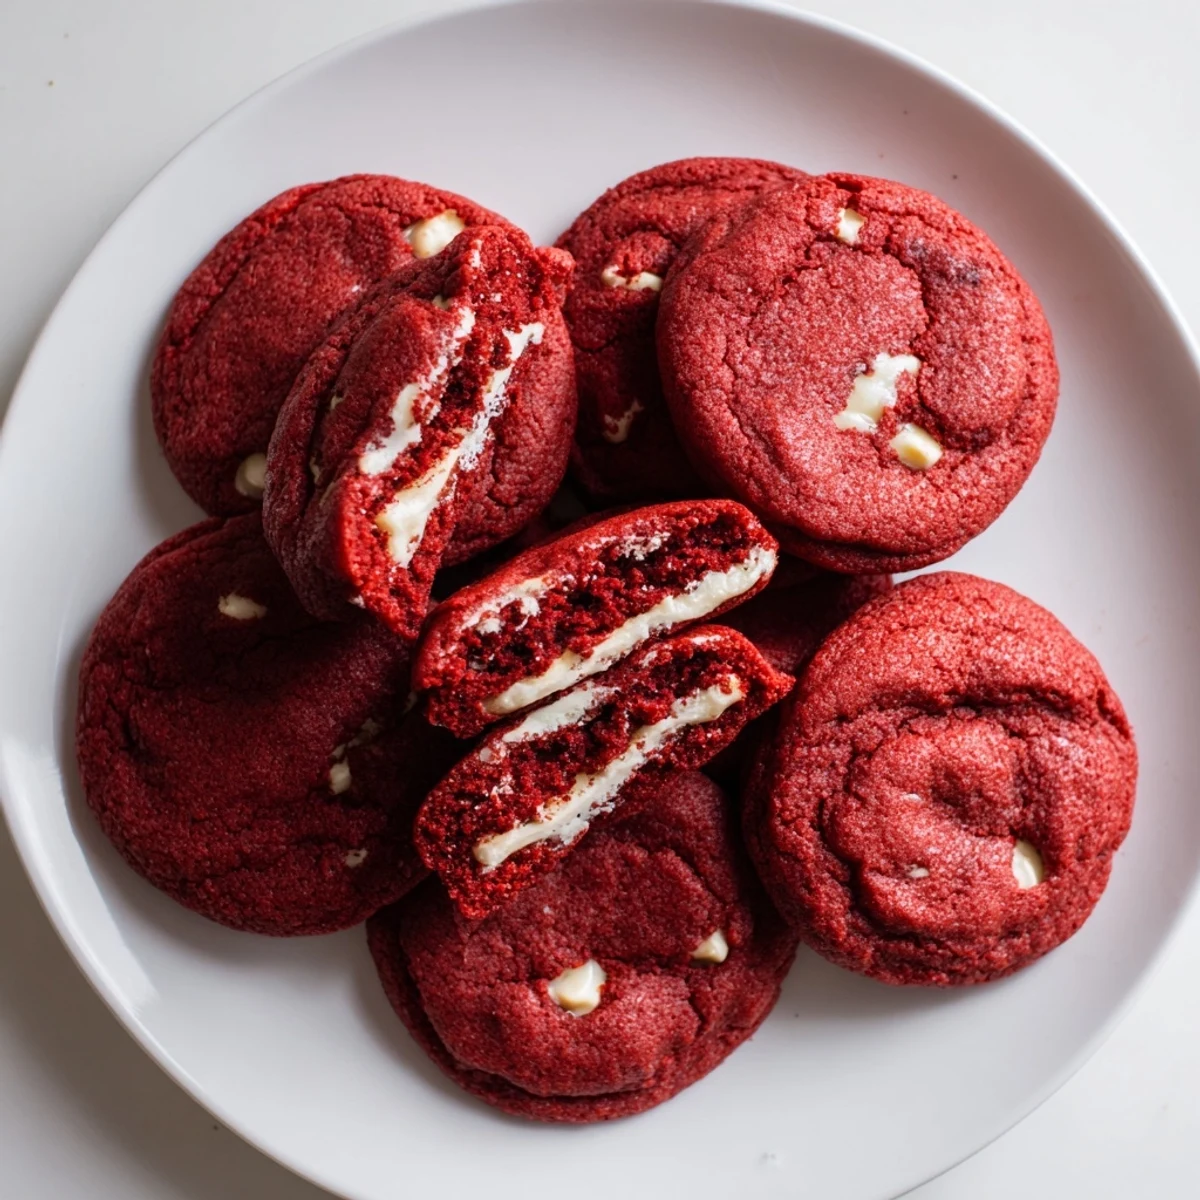
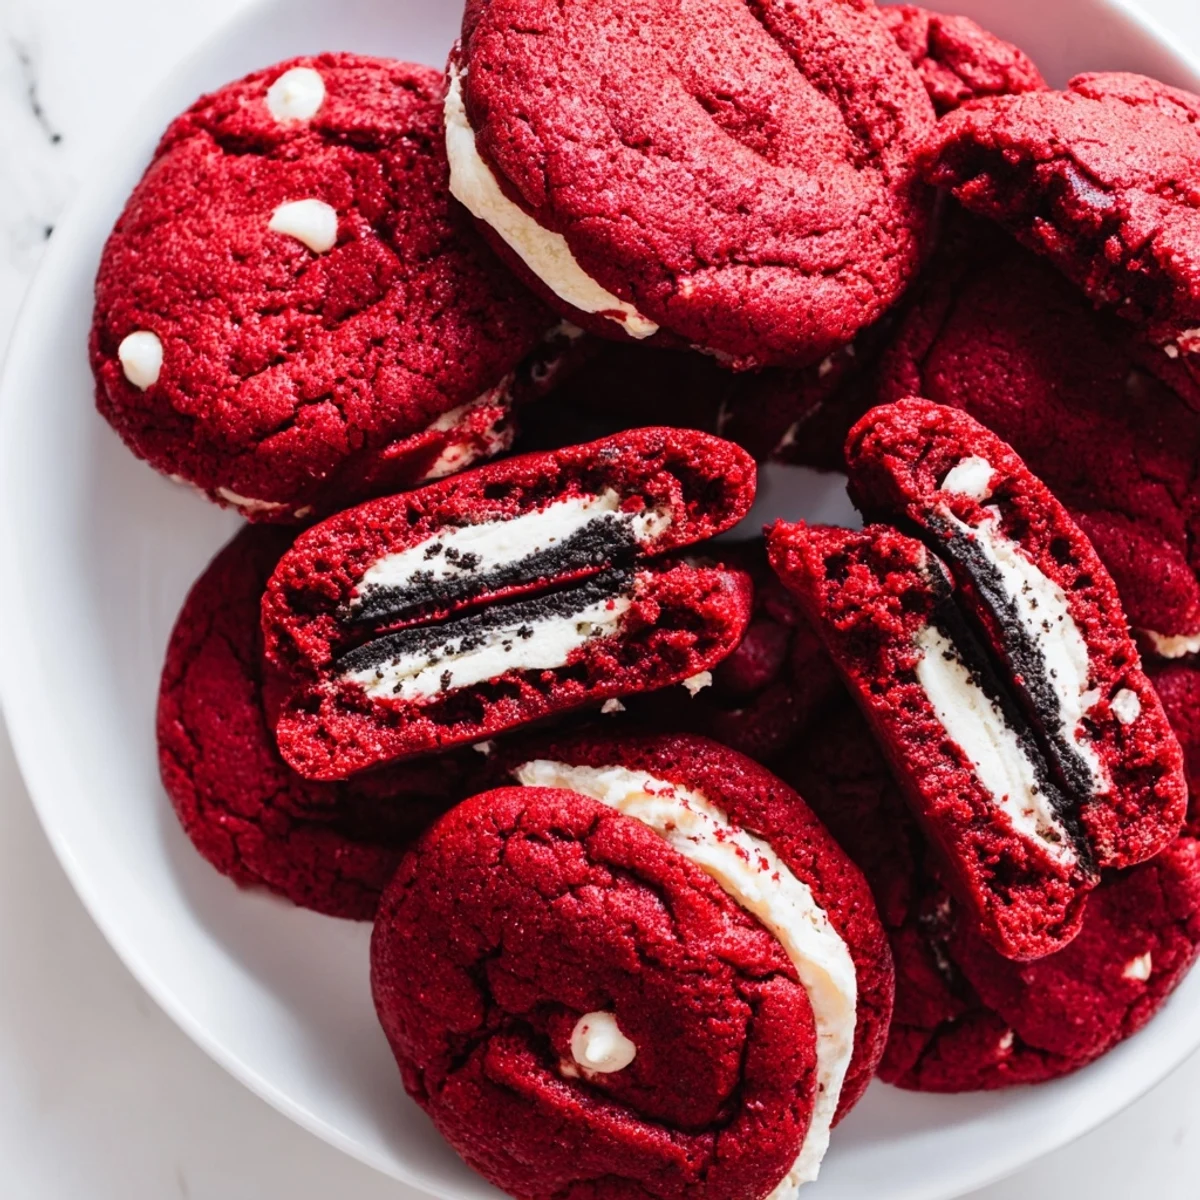
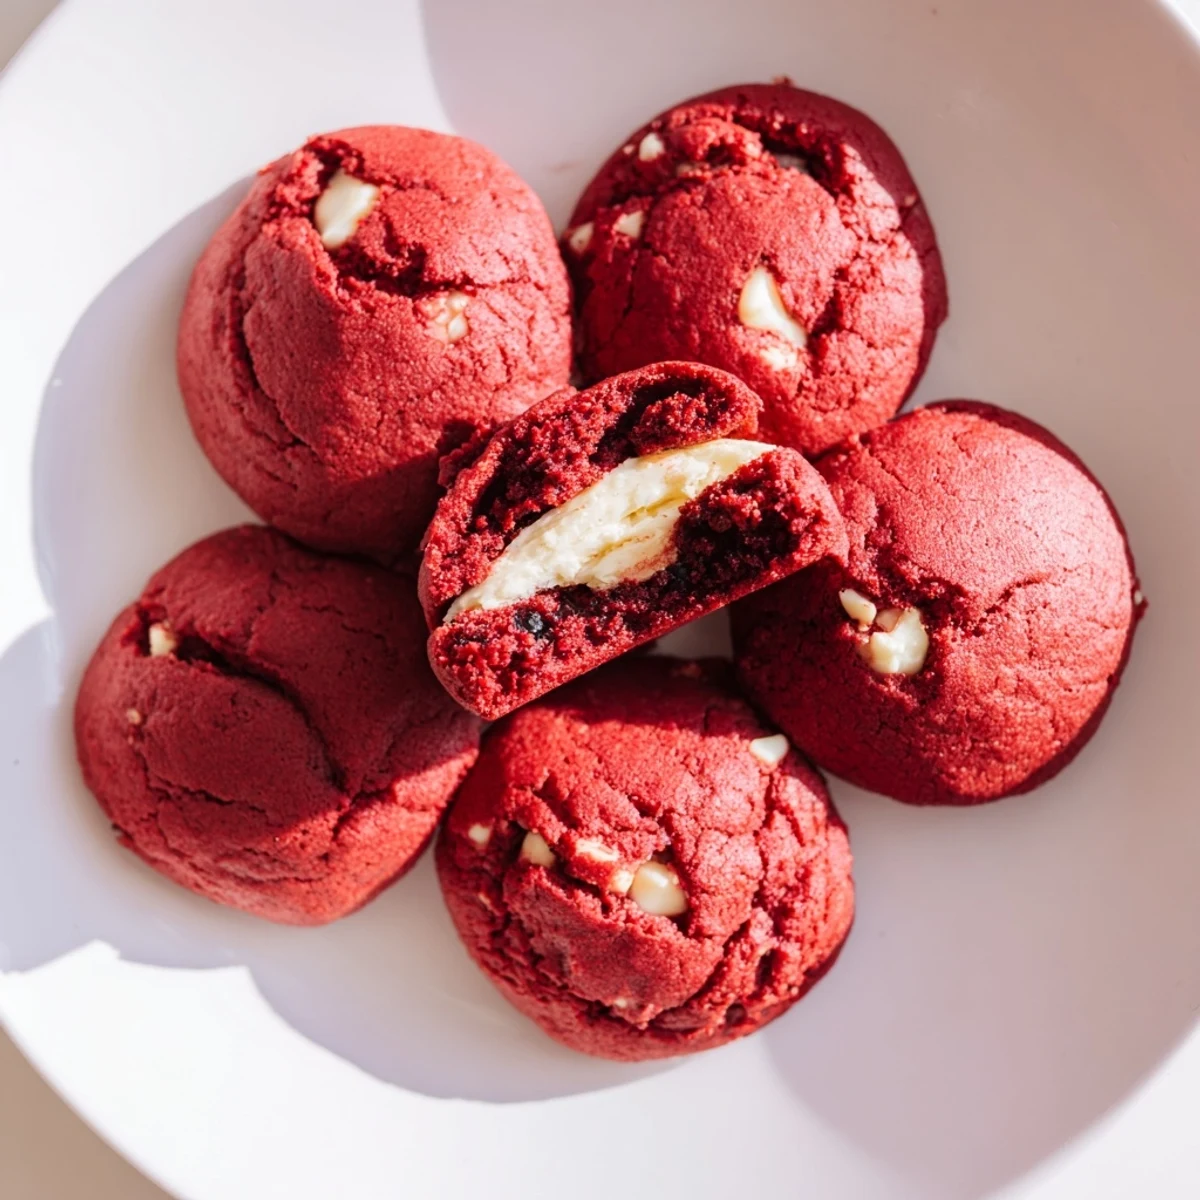
 These stuffed cookies feature soft red velvet dough infused with cocoa and studded with white chocolate chips. The surprise center holds a creamy cheesecake-style filling blended with crushed Oreos. Bake until edges are set while centers remain tender, creating a perfect contrast between the chewy exterior and smooth filling.
I stumbled into red velvet cookies by complete accident when I dyed my regular chocolate chip dough pink for Valentine's Day, and my kitchen hasn't been the same since. Something about that velvety crimson crumb makes people pause and smile before they even take a bite. These became my go-to for breaking tension at dinner parties—nothing awkward survives when everyone's busy marveling at cookies that look like they came from a boutique bakery.
Last Christmas, my neighbor's daughter spotted a cooling rack of these through my window and literally knocked on the door within minutes. Now they're requested at every neighborhood potluck, and I've learned to double the batch because somehow they vanish faster than plain cookies ever did.
Ingredients
- All-purpose flour: The backbone that gives these cookies their chewy structure
- Unsweetened cocoa powder: Provides that subtle chocolate depth without overwhelming the velvet flavor
- Baking soda: Creates the perfect tender lift so cookies stay soft, not cakey
- Salt: A crucial pinch that balances the sweetness and makes chocolate sing
- Unsalted butter: Room temperature butter creams into the sugars for that melt-in-your-mouth texture
- Granulated sugar: Creates crisp edges while keeping centers delightfully chewy
- Light brown sugar: Adds moisture and a hint of caramel that deepens the red velvet flavor
- Large egg: Binds everything together while contributing richness
- Milk: Just enough to hydrate the dough without making it sticky
- Vanilla extract: Don't skimp here—it rounds out all the flavors beautifully
- Red food coloring: Gel coloring gives the most vibrant crimson without thinning the dough
- White chocolate chips: Creamy pockets that complement rather than compete with the Oreo filling
- Cream cheese: The star of the filling, lending tang and creaminess
- Powdered sugar: Sweetens the filling while keeping it smooth and spreadable
- Oreo cookies: Finely crushed, they create that signature cookies-and-cream moment inside
Instructions
- Preheat your kitchen:
- Heat oven to 350°F and line two baking sheets with parchment paper
- Whisk the dry team:
- Combine flour, cocoa powder, baking soda, and salt in a medium bowl
- Cream the butter and sugars:
- Beat until light and fluffy, then add egg, milk, vanilla, and red food coloring
- Bring it together:
- Gradually mix in dry ingredients until just combined, then fold in white chocolate chips
- Make the magic filling:
- Beat cream cheese and butter until smooth, add powdered sugar and vanilla, then fold in crushed Oreos and chill for 10 minutes
- Stuff the surprise:
- Flatten dough portions, place a teaspoon of chilled Oreo filling in center, and seal edges to enclose
- Space them out:
- Arrange stuffed dough balls on prepared sheets with 2 inches between each
- Bake to perfection:
- Cook for 11 to 12 minutes until edges are set but centers still look slightly soft, then cool completely
 Pin it
 My sister-in-law actually gasped when she bit into her first one, not expecting that creamy Oreo center hiding inside. Now every family gathering feels incomplete without a platter of these crimson beauties waiting on the counter.
Getting the Red Right
I've learned that gel food coloring gives the most vibrant red without thinning out your dough like liquid coloring can. Start with a teaspoon and add more until you reach that classic velvet shade—remember, the color deepens slightly during baking.
Stuffing Without the Stress
The trick is working quickly with cold hands, so I keep a bowl of ice water nearby while assembling. If the filling starts getting too soft and melty, just pop the whole bowl back in the fridge for five minutes and continue.
Make-Ahead Magic
These cookies freeze incredibly well, either baked or as unbaked stuffed dough balls. I often double the recipe and freeze half, then bake them straight from frozen for fresh cookies whenever the mood strikes.
- Roll extra dough balls in crushed Oreos before baking for extra crunch
- Swap semi-sweet chips if white chocolate feels too sweet for your taste
- Store baked cookies in airtight containers for up to three days
 Pin it
 There's something deeply satisfying about biting through a chewy red velvet cookie into that cool, creamy Oreo center. These have become my secret weapon for turning any random Tuesday into something worth celebrating.
Recipe FAQs
- → Can I make the dough ahead of time?
-
Yes, refrigerate the dough for up to 24 hours before baking. Let it sit at room temperature for 15 minutes before scooping and stuffing.
- → How do I prevent the filling from leaking during baking?
-
Chill the Oreo filling for at least 10 minutes before stuffing. Seal the dough edges tightly around the filling and place cookies seam-side down on the baking sheet.
- → Can I use gel food coloring instead of liquid?
-
Absolutely—gel food coloring provides more vibrant color with less liquid. Start with 1/4 teaspoon and add more until desired shade is achieved.
- → What's the best way to crush Oreos for the filling?
-
Place Oreos in a sealed plastic bag and crush with a rolling pin, or pulse briefly in a food processor until fine crumbs form.
- → How should I store these cookies?
-
Keep in an airtight container at room temperature for up to 3 days. For longer storage, refrigerate for up to a week—bring to room temperature before serving.
- → Can I freeze these cookies?
-
Freeze baked cookies in a freezer-safe container for up to 3 months. Thaw overnight in the refrigerator or at room temperature for 2 hours.