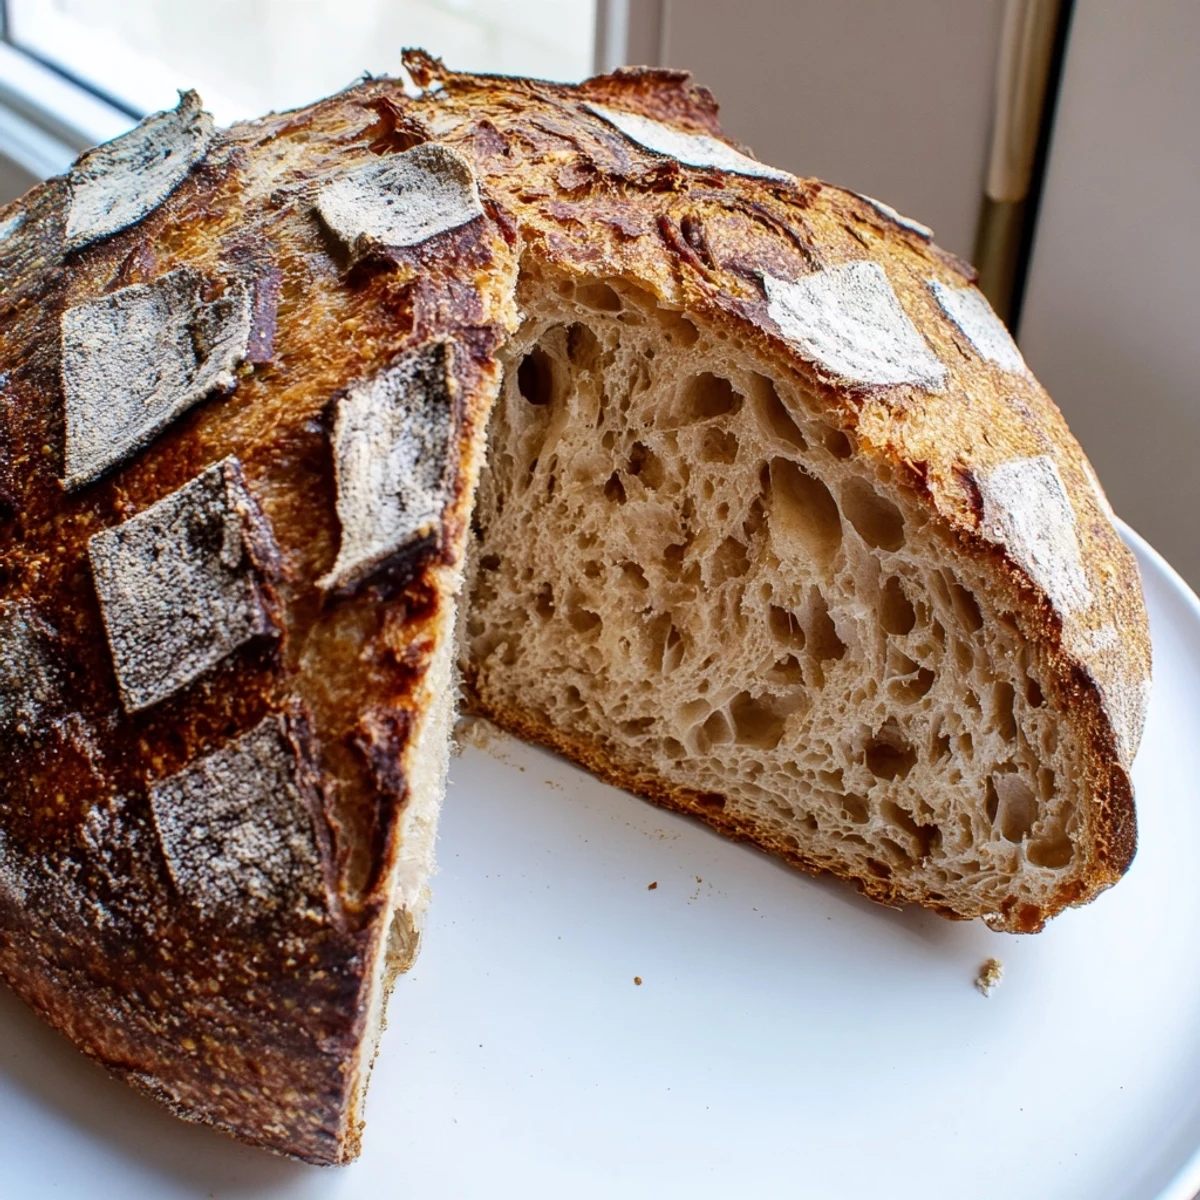
 Pin it
 Craft an authentic artisan loaf using traditional wild yeast fermentation methods. This naturally leavened bread develops a distinctive tangy flavor through extended fermentation, creating the perfect balance of crispy crust and tender, chewy interior. The process combines simple ingredients with time-honored techniques including autolyse, stretch-and-fold folds, and Dutch oven baking to achieve professional bakery results at home.
The first time I pulled a homemade sourdough from my oven, the crust crackled like autumn leaves underfoot. That sound—music to any bread baker's ears—told me everything I needed to know about what was waiting inside. My kitchen smelled transformed, like an old-world bakery had moved in overnight.
I started bringing loaves to dinner parties instead of wine, and suddenly I was everyones favorite guest. Watching friends tear into that crackling crust, seeing their eyes widen at the open crumb and tangy bite—nothing beats that moment. One friend actually admitted she'd been eating mine for breakfast with nothing but butter, no toaster needed.
Ingredients
- Active sourdough starter: This living culture is everything—feed it until it doubles in volume and bubbles enthusiastically, then you know it's ready to work its magic
- Bread flour: The higher protein content here builds the gluten network that gives your loaf its structure and those gorgeous interior holes
- Whole wheat flour: Just a handful adds nutty complexity and helps fermentation along with its natural enzymes
- Water: Room temperature is key—too cold and your dough will sluggishly resist, too warm and fermentation rushes ahead before flavor develops
- Sea salt: Dont be tempted to reduce this—salt strengthens gluten and keeps fermentation in check while making all those wheat flavors sing
Instructions
- Build the foundation:
- Combine your bread flour, whole wheat flour, and water in a large bowl until shaggy and just mixed, then cover and let it rest for an hour to hydrate fully
- Bring it together:
- Add your bubbly starter and sea salt, mixing by hand until everything is incorporated and the dough starts developing some strength
- Train the dough:
- Let it ferment at room temperature for 4–5 hours, performing a stretch and fold every 30–45 minutes to build structure without overworking
- Give it shape:
- Turn onto a lightly floured surface, gently form a round, let it rest for 20 minutes to relax the gluten, then shape into a tight loaf and place seam-side up in a floured proofing basket
- Let it rise:
- Cover and proof for 2–3 hours at room temperature, or refrigerate overnight for deeper sour flavor and easier handling
- Get ready to bake:
- Heat your Dutch oven in a 250°C oven for at least 30 minutes while the dough finishes its final rise
- Create your masterpiece:
- Gently invert dough onto parchment, score boldly with a sharp blade, then bake covered for 20 minutes before removing the lid and finishing at 220°F until deeply golden
- Practice patience:
- Cool completely on a wire rack—slicing into warm bread is tempting but ruins the crumb structure that took hours to develop
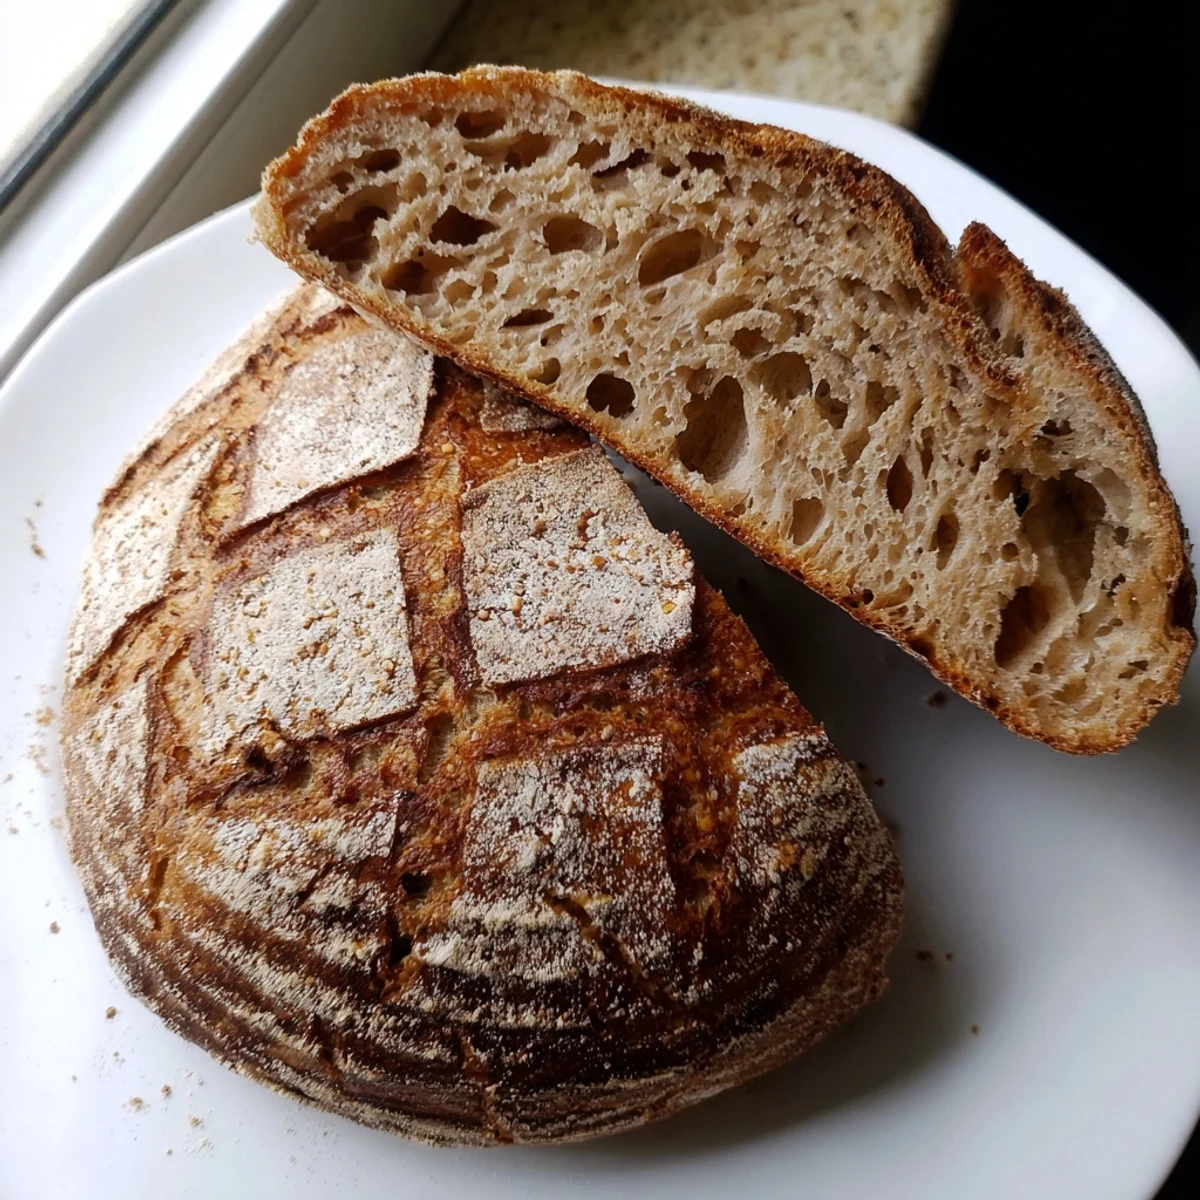
 Pin it
 The morning my sixyearold asked why bread from the store doesnt crunch like ours, I knew I'd created something irreplaceable. Now she stands on her stool watching the bubbles form during stretch and folds, already learning that good things cant be rushed.
Understanding Your Starter
Your starter is alive—it has good days and bad days, needs regular feeding, and will tell you when it's happy or struggling. A healthy starter should double within 4–6 hours of feeding and smell pleasantly tangy, not metallic or overly sour. If yours seems sluggish, try switching flours or adjusting your feeding schedule for a week before baking.
The Dutch Oven Secret
That heavy pot creates a steam chamber that mimics professional bread ovens, giving your loaf the oven spring and blistered crust that makes sourdough spectacular. Preheating it thoroughly is nonnegotiable—cold pot means flat bread. If you don't have a Dutch oven, a cast iron skillet with an upside-down metal bowl works surprisingly well.
Timing Your Bake
Learning to read your dough's cues matters more than following a clock to the minute. The poke test—gently pressing the dough and watching how quickly it springs back—will tell you more than any timer ever could. When it's perfectly proofed, it'll slowly fill back in but still show a slight indentation.
- Cold proofing overnight makes scoring easier and gives you that professional ear
- A razor blade or fresh XActo blade scores cleaner than dull knives
- The internal temperature should reach 205–210°F for fully baked bread
 Pin it
 Theres something profoundly satisfying about transforming just flour and water into bread that sustains and connects. May your kitchen always smell of fermentation and your crusts always sing.
Recipe FAQs
- → What makes sourdough different from regular bread?
-
Wild yeast fermentation creates natural lactic acid, giving the loaf its characteristic tangy flavor and chewy texture. The longer fermentation process also makes nutrients more accessible and easier to digest.
- → How do I know when my starter is active enough?
-
Your starter should be bubbly, doubled in size within 4-8 hours after feeding, and have a pleasant slightly sour aroma. The surface should show plenty of small bubbles throughout.
- → Can I speed up the fermentation process?
-
While tempting, longer fermentation develops better flavor and texture. You can place the dough in a slightly warmer area (75-80°F) to speed things up moderately without sacrificing quality.
- → Why do I need a Dutch oven?
-
A preheated Dutch oven creates steam during baking, essential for developing that crackling, crispy crust. It mimics professional steam-injected ovens for superior results.
- → How should I store my finished loaf?
-
Store cut side down on a cutting board at room temperature for up to 2 days. For longer storage, wrap tightly and freeze. Avoid refrigeration as it accelerates staling.
- → What if I don't have a proofing basket?
-
A well-floured bowl lined with a clean kitchen towel works perfectly. The flour coating prevents sticking while supporting the dough's shape during final proofing.